

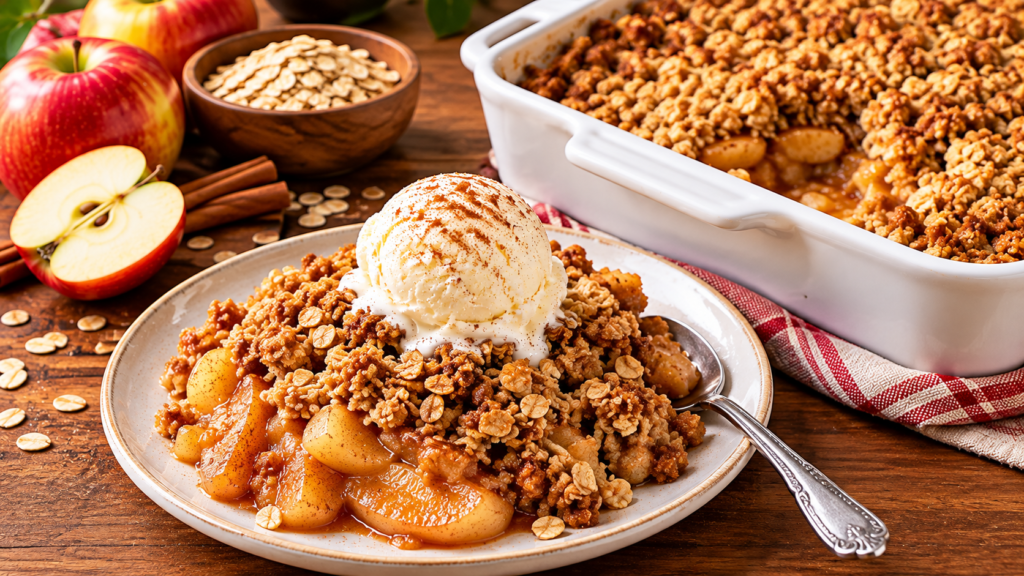
Easy Homemade Apple Crisp with Oats
Warm, cozy, and irresistibly delicious! This classic apple crisp combines tender cinnamon-spiced apples with a buttery, golden oat topping. Perfect for a comforting homemade dessert!
Ingredients:
- 6 medium apples, peeled, cored, and sliced
- 1 tablespoon lemon juice
- ½ cup granulated sugar
- 1 teaspoon ground cinnamon
- ¼ teaspoon ground nutmeg
- 1 cup old-fashioned rolled oats
- ¾ cup all-purpose flour
- ½ cup packed brown sugar
- ½ cup unsalted butter, melted
- ½ teaspoon vanilla extract
- ¼ teaspoon salt
Instructions:
- Prepare the apples — 10 minutes: Preheat the oven to 350°F (175°C). Toss the sliced apples with lemon juice, granulated sugar, cinnamon, and nutmeg.
- Make the oat topping — 5 minutes: In a bowl, combine the rolled oats, flour, brown sugar, and salt. Stir in the melted butter and vanilla until the mixture becomes crumbly.
- Assemble — 5 minutes: Spread the seasoned apples evenly in a greased 9-inch baking dish. Sprinkle the oat mixture generously over the apples.
- Bake — 40–45 minutes: Bake until the apples are tender and bubbling around the edges and the topping is golden brown and crisp.
- Cool — 10 minutes: Remove from the oven and let the crisp cool slightly before serving.
- Serve: Enjoy warm with a scoop of vanilla ice cream or a dollop of whipped cream for the ultimate homemade treat!
Prep Time: 20 minutes | Cooking Time: 45 minutes | Total Time: 1 hour 5 minutes
Kcal: Approximately 320 kcal | Servings: 8 servings.
The BEST Easy Apple Crisp with Oats Recipe Ever!
Have you wondered why some desserts feel like a warm hug on a chilly evening? Homemade treats fill your kitchen with cinnamon and brown sugar scents.
Our old fashioned easy apple crisp offers comfort whenever you crave it. This classic apple crisp recipe uses simple pantry staples for a golden, buttery topping and tender fruit.


Host a large family dinner or relax on a weekend with this crowd-pleasing dish. We believe this is the best apple crisp you will ever bake. Serve it warm for the most comforting texture and flavor.
Key Takeaways
- Discover the secret to a perfectly golden, buttery topping.
- Learn how to balance warm spices for a cozy flavor.
- Master a simple method that saves time in the kitchen.
- Find out why serving this dessert warm makes a difference.
- Get tips for choosing the right fruit for your bake.
Why This Apple Crisp with Oats Is the Best
Achieving the perfect balance of textures is the secret to a dessert everyone will love. When tender fruit, thick juices, and a crisp topping work together, you have found the best apple crisp recipe. This dish uses simple techniques to make humble ingredients taste gourmet.

What makes the filling juicy without becoming watery
The key to a perfect filling is how fruit releases its natural sugars while baking. Choose the right apple varieties and slice them evenly, so they soften without turning mushy. A little thickener binds the juices and creates a rich sauce around each slice.
How the golden oat topping delivers crisp texture
A memorable topping needs old-fashioned oats, flour, brown sugar, and cold butter. These ingredients create flavorful clusters that stay crunchy after the fruit bakes. The oats add a hearty bite, while butter makes the topping golden brown and caramelized.
Why this old fashioned easy apple crisp is a reliable fall dessert
This recipe suits beginners but still tastes like a special-occasion treat. It works for any gathering because it needs little prep time and uses pantry staples. Understanding what are common apple crisp mistakes? can help you avoid problems and succeed every time.
| Common Mistake | Result | The Fix |
|---|---|---|
| Over-slicing apples | Mushy filling | Slice into uniform 1/2 inch pieces |
| Skipping the thickener | Watery consistency | Use a touch of flour or cornstarch |
| Softened butter | Greasy topping | Use cold, cubed butter for texture |
| Rushing the cooling | Runny juices | Let it set for 15 minutes |
These steps show why this recipe answers what is the best apple crisp recipe ever?. It is comfort food that brings warmth and joy to any table.
Ingredients for a Classic Apple Crisp Recipe
A great apple crisp balances tart fruit with a crunchy topping. Learning how to make the best apple crisp with oats starts with fresh, quality ingredients that balance sweetness and acidity.

Apples, lemon juice, sugar, and warm spices for the filling
The fruit forms the heart of your dessert. You may ask, how many apples should you use for apple crisp? Use about 6 to 8 medium-sized apples for a standard 9×13 inch baking dish. This creates a generous fruit layer.
Toss sliced apples with fresh lemon juice to brighten their flavor and prevent browning. Granulated sugar, cinnamon, and nutmeg create a deliciously spiced syrup as the fruit bakes.
Old-fashioned oats, flour, brown sugar, butter, and cinnamon for the topping
The signature crunch comes from pantry staples. Old-fashioned rolled oats give the best texture, while all-purpose flour binds the mixture into golden, buttery clusters.
Brown sugar adds deep, molasses-like sweetness and moisture. Cold, cubed butter and cinnamon help create a topping that crisps beautifully in the oven.
Optional additions for nuts, extra spice, or a less-sweet dessert
Customize your crisp to suit your taste. Chopped pecans or walnuts add a delightful nutty crunch that pairs well with soft apples.
- Add a pinch of ground ginger or cloves for extra warmth.
- Reduce the sugar in the filling if you prefer a more tart, fruit-forward dessert.
- Sprinkle a pinch of sea salt over the topping to balance the sweetness.
Ingredient notes for vegan, gluten-free, and lighter apple crisp variations
You can adapt this recipe for different dietary needs. For a vegan version, replace dairy butter with a high-quality plant-based butter stick.
For a gluten-free dessert, use certified gluten-free oats and a 1-to-1 gluten-free flour blend. Ask yourself: which is better, apple cobbler or apple crisp? A crisp has a lighter, more textured topping that highlights fruit without a cobbler’s heavy dough.
Choosing the Best Apples for Apple Crisp
Choosing the right fruit helps create the best homemade apple crisp with oats — crispy, golden & irresistible! Only a few varieties can withstand high oven temperatures without turning into applesauce.
Best apple varieties for flavor and structure
Granny Smith, Honeycrisp, Pink Lady, and Braeburn
For a reliable viral apple crisp with oats — easy, homemade & delicious!, choose firm, crisp apples. Granny Smith is the gold standard because its tart flavor balances the sugar. Honeycrisp adds sweetness and crunch.
Pink Lady and Braeburn are also excellent choices. They hold their shape during baking, giving each bite a satisfying texture.
Combining tart and sweet apples for balanced flavor
Using one apple type can create a one-dimensional flavor. Mix a tart variety like Granny Smith with a sweeter one like Honeycrisp.
This pairing creates a complex, layered taste that elevates the dish. It helps create the best easy apple crisp with oats recipe ever!

How many apples should you use for apple crisp?
The number of apples depends on your baking dish and fruit size. Usually, 6 to 8 medium-sized apples fill a standard 9×13 inch pan.
Apples shrink as they release moisture in the oven. A slightly heaping dish is better than one that looks sparse after the fruit settles.
How to prepare, peel, core, and slice the apples evenly
Proper preparation helps every piece cook at the same rate. Peel the apples first to remove tough skin, which can become chewy when baked.
Core the fruit, then slice the apples into uniform pieces, about 1/4 to 1/2 inch thick. Consistency is key; slices that are too thin turn mushy, while thick slices may stay crunchy as the topping browns.
How to Make the BEST Apple Crisp with Oats
Making a delicious dessert at home is simpler than you might think. You can make an easy apple crisp with oats that tastes like homemade comfort! Follow these simple steps for a bakery-quality treat, even if you are a beginner.
Prepare the baking dish and preheat the oven
Preheat your oven to 375°F (190°C). A hot oven helps create the perfect golden crust. Lightly grease a 9×9 inch baking dish with butter or non-stick spray to stop fruit from sticking to the sides.
Mix the apple filling until every slice is coated
In a large bowl, toss sliced apples with lemon juice, granulated sugar, cinnamon, and nutmeg. Add a small amount of flour or cornstarch to thicken the juices as they cook. Coat every slice evenly so the flavors blend during baking.
Make the buttery oat topping with the right crumbly texture
In another bowl, combine oats, brown sugar, flour, and cold butter. Use your fingers or a pastry cutter to work the butter into the dry ingredients until coarse crumbs form. Remember, this viral apple crisp with oats is so easy to make!
“The secret to a great crisp is the contrast between the tender, spiced fruit and the buttery, crunchy topping.”
Layer the apples and topping without compacting the oats
Pour the apple mixture into the prepared baking dish and spread it evenly. Gently scatter the oat topping over the fruit with your hands. Avoid pressing the topping down, because a light topping lets steam escape while it browns.
Bake until the filling bubbles and the topping is crispy and golden
Place the dish in the oven’s center and bake for about 40 to 45 minutes. It is ready when the filling bubbles around the edges and the topping turns golden brown. This is the top apple crisp with oats recipe you need to try this fall!
Cool the crisp before serving so the juices can thicken
After removing the dish, let it rest on a wire rack for at least 15 minutes. Cooling allows the fruit juices to thicken into a rich, spoonable sauce. Serving it too soon may make the crisp runny, so patience creates the perfect bite.
How to Get a Crispy, Golden Oat Topping
A crispy, buttery topping defines an easy homemade apple crisp with oats — the ultimate cozy dessert! Learning how to make the best golden oat-topped apple crisp! starts with the right ingredient texture. These simple techniques give each bite the satisfying crunch we crave.
Old-fashioned oats versus quick oats
For the best results, choose old-fashioned rolled oats. They add a hearty, chewy texture that holds up well in oven heat. Quick oats are smaller and can make a mushy or powdery topping without the desired rustic appeal.
Why cold or softened butter changes the topping texture
Butter temperature helps create the perfect crumb. Cold, cubed butter forms distinct, buttery clusters that stay intact while mixing. Soft or melted butter can create a dense, greasy layer instead of a light, crumbly crust.
How flour and brown sugar create crisp, caramelized clusters
Flour binds the topping together. With brown sugar, it creates rich, caramelized flavor as the sugars melt and bubble. This reaction is what gives the topping its signature golden-brown finish.
“The secret to a perfect crisp is the balance between the tender fruit and the crunch of the topping.” — Anonymous
When to add chopped pecans or walnuts
If you want more crunch, add nuts. Fold chopped pecans or walnuts into the topping during the final mixing stage. They toast perfectly without burning, adding nutty depth to your best ever apple crisp with oats — simple ingredients, amazing flavor!
How to prevent the topping from becoming soft or greasy
To keep the topping crisp, avoid over-mixing, which can melt the butter too soon. Do not cover the dish with foil during baking’s final minutes, because trapped steam softens the crust. Let the dessert rest for at least 15 minutes after baking so the juices can set.
Common Apple Crisp Mistakes and How to Avoid Them
A top-rated homemade apple crisp with a crunchy oat topping depends on avoiding common mistakes. Small errors can cause soggy fruit or a mushy crust, even when the method seems simple.
Using apples that release too much water
The wrong apple variety often causes a soupy dessert. Some apples hold much water and break down quickly in heat, making the filling watery.
Cutting apple slices too thick or too thin
Even slices help the crisp bake well. Thick slices stay firm, while thin slices collapse into a mushy, sauce-like texture.
Adding too much sugar, flour, or liquid to the filling
Use care with sugar, flour, and liquid because balance matters. Too much sugar draws out moisture, while excess flour can make the filling gummy and hide fresh fruit flavor.
Underbaking before the fruit juices begin to bubble
Do not remove the crisp too early. Wait until the juices are actively bubbling around the edges; this shows the thickener worked and the fruit cooked fully.
“The secret to a perfect crisp is patience; if the juices aren’t bubbling, the starch hasn’t thickened, and the texture will be compromised.”
Covering the crisp for too long and losing the crunchy topping
Covering the dish with foil for the whole bake traps steam. This prevents golden-brown crunch in a viral homemade apple crisp with oats — one bite is never enough!
Serving immediately instead of allowing the filling to set
Resist scooping the crisp as soon as it leaves the oven. Let it rest for at least 15 minutes so the juices thicken. That is how to make easy apple crisp with the perfect oat topping!
- Select firm apples like Granny Smith or Honeycrisp.
- Slice evenly to ensure consistent cooking times.
- Watch for bubbles to confirm the filling is ready.
- Rest the dish to allow the structure to firm up.
Should Apple Crisp Be Baked Covered or Uncovered?
Mastering your oven helps you create the best apple crisp with oats recipe — easy, cozy & homemade! Many home bakers ask whether to cover the baking dish. Your choice affects the dessert’s final texture.
Why uncovered baking creates the crispiest topping
For the best crunch, bake your dessert uncovered. This lets extra moisture escape from the fruit. As steam leaves, the oat topping stays dry and becomes perfectly caramelized instead of soggy.
When loosely covering the dish can prevent over-browning
Sometimes, the edges of your apple crisp recipe with oats brown before the fruit cooks underneath. If the topping gets too dark, place a loose sheet of aluminum foil over it. This protects the oats while the apples continue softening.
How to re-crisp leftovers after refrigeration
Refrigeration softens the crunchy topping as it absorbs moisture. To restore its fresh-baked texture, avoid the microwave. Warm leftovers in a preheated oven or toaster oven at 350°F for about ten minutes.
Signs the apples are tender and the topping is fully baked
Do not rely only on a timer when following apple crisp with oats recipes. Look for thick, bubbling fruit juices around the dish’s edges. The topping should be deeply golden brown, and a knife should slide easily into tender apples.
| Baking Method | Resulting Texture | Best Use Case |
|---|---|---|
| Uncovered | Maximum Crunch | Standard baking |
| Loosely Covered | Softened Topping | Preventing burning |
| Reheated in Oven | Restored Crispness | Leftover recovery |
Apple Crisp Variations for Every Dessert Table
Trying new ways to prepare this classic dish helps you serve every guest at your table. For a holiday gathering or cozy treat, the best apple crisp recipe with oats is a great start. You can adjust the base for dietary needs or texture preferences without losing its comforting character.
Viral apple crisp with oats with extra crunchy clusters
If you love a dramatic crunch, focus on the topping. Instead of fully rubbing in the butter, leave larger, pea-sized dough crumbs throughout the mixture. These clusters bake into golden, irresistible nuggets and contrast with the tender fruit below.
Healthy apple crisp with reduced sugar and added nuts
Creating a lighter version of an easy apple crisp recipe with oats is surprisingly simple. Reduce the brown sugar by one-third, then replace it with maple syrup or honey. Chopped walnuts or pecans add delightful nutty flavor and healthy fats, helping you feel satisfied longer.
Vegan apple crisp made with plant-based butter
Plant-based diets can still include this fall favorite. Swap traditional dairy butter for a high-quality vegan butter stick. Keep the butter chilled before cutting it into flour and oats, preserving the essential flaky, crumbly texture everyone loves.
Gluten-free apple crisp using certified gluten-free oats and flour
An easy recipe for apple crisp with oats that is also gluten-free can help many families. Check oat and flour packages for labels that say “certified gluten-free.” This keeps dessert safe for people with sensitivities while preserving the classic, rustic charm of the original dish.
How to make a deep-dish or small-batch apple crisp
Your recipe size depends largely on the depth of your baking vessel. A deep-dish pan needs more time at a slightly lower temperature, so center fruit cooks without burning the top. Small-batch versions in ramekins cook much faster, so watch the oven closely for that perfect golden-brown finish.
Apple Crisp, Apple Crumble, and Apple Cobbler Compared
People often use these names interchangeably, but apple crisp, crumble, and cobbler have different toppings. Knowing these differences helps you choose the warm, fruit-filled dessert that best satisfies your craving.
What is the difference between apple crumble and apple crisp?
The main difference is the topping. An apple crisp with oats has a streusel-like topping with rolled oats for a toasted crunch.
By contrast, a traditional crumble topping usually combines flour, sugar, and butter. It lacks oats’ chewy, nutty texture, so it feels sandy or clumpy instead of crisp.
Which is better, apple cobbler or apple crisp?
Your choice depends on the texture you prefer. A cobbler has a biscuit-like or cake-like topping dropped onto fruit in mounds. This creates a soft, bread-like layer that absorbs the juices.
By contrast, a homemade apple crisp combines soft, tender baked fruit with a crunchy, buttery topping. If you enjoy a satisfying snap in every bite, the crisp may be your best choice.
How oats distinguish a classic apple crisp topping
Oats are the secret weapon that lifts an easy apple crisp recipe above other fruit desserts. During baking, oats toast in butter and sugar, creating a complex, caramelized flavor.
This keeps the topping firm and separate from the fruit underneath. Without oats, the topping might melt into the fruit and lose the signature texture that makes this dessert beloved.
When to choose crisp, crumble, or cobbler for a gathering
Choose your dessert based on the occasion and your guests’ preferences. Use this quick guide to decide:
- Choose a crisp when you want a crowd-pleasing, textural experience that pairs perfectly with vanilla ice cream.
- Choose a crumble if you prefer a more uniform, buttery topping that highlights the fruit without the chewiness of oats.
- Choose a cobbler when you want a heartier, more cake-like dessert that feels like a warm, comforting hug.
Whether it is a weeknight treat or holiday feast, these differences help your homemade apple crisp shine.
Serving, Storing, and Reheating Homemade Apple Crisp
Once dessert leaves the oven, proper serving and storage help each bite stay delicious. Whether you made traditional apple crisp or a healthy apple crisp, the right finishing touches matter.
The best toppings: vanilla ice cream, whipped cream, or caramel sauce
The best apple crisp is always served warm, creating a pleasant contrast with cold toppings. Many families choose a generous scoop of high-quality vanilla bean ice cream. A dollop of freshly whipped cream or a drizzle of salted caramel sauce adds a rich finish to your apple crisp topping.
How long apple crisp lasts at room temperature and in the refrigerator
If you have leftovers, let the dish cool completely before covering it. You can keep the crisp at room temperature for up to two days in a cool kitchen. For longer storage, refrigerate it for up to five days to maintain its best quality.
How to reheat individual portions without drying out the apples
To keep fruit moist, microwave individual servings for about 30 to 60 seconds. For a crunchier texture, heat the portion in a toaster oven at 350°F for five minutes. This quick method helps revive the apple crisp topping so it does not become soggy.
Freezing baked and unbaked apple crisp
You can freeze your dessert, baked or unbaked, for up to three months. Use an airtight container to prevent freezer burn and moisture buildup. When ready to eat, thaw the dish in the refrigerator overnight before baking or warming it through.
| Storage Method | Shelf Life | Best Practice |
|---|---|---|
| Room Temperature | 1-2 Days | Keep covered tightly |
| Refrigerator | 4-5 Days | Use airtight container |
| Freezer | 3 Months | Wrap in foil and plastic |
What Makes This the Best Apple Crisp Recipe Ever?
You might wonder what makes a simple fruit bake the best apple crisp recipe you have ever tasted. Its secret is the careful harmony between juicy, spiced fruit and a crunchy, buttery topping that stays crisp in oven.
How the classic method balances tender apples and a crunchy topping
A truly exceptional apple crisp dessert relies on contrasting textures. By slicing apples evenly, they soften into tender, jammy fruit while the topping stays crisp and golden. This contrast gives every bite a satisfying crunch, followed by warm cinnamon-spiced fruit.
How this recipe compares with the Betty Crocker apple crisp approach
Many home bakers know the traditional Betty Crocker style for its reliability and simplicity. Our method shares that comfort while using specific techniques to improve the texture.
Core ingredients commonly found in Betty Crocker’s apple crisp recipe
Both approaches use pantry staples like flour, sugar, butter, and oats. These ingredients create a classic, nostalgic flavor that feels like home. A standard version uses them too; a vegan apple crisp uses plant-based butter, and a gluten-free apple crisp uses certified oats.
Differences in oat topping texture, sweetness, and preparation
The main difference is the ingredient ratio and how we handle butter. We keep butter cold to form larger, distinct clusters that stay crunchy longer. We also balance brown sugar’s sweetness, so the apples’ natural tartness shines instead of hiding behind too much sugar.
Final checklist for a cozy, homemade, irresistible dessert
Before pulling your masterpiece from the oven, use this quick checklist for perfection:
- Apple Tenderness: The fruit should be soft enough to pierce easily with a fork.
- Bubbling Juices: Look for thick, syrupy bubbles around the edges of the dish.
- Golden Topping: The oats should be toasted to a deep, rich golden brown.
- Resting Time: Allow the dish to sit for at least 15 minutes so the juices can thicken.
- Serving Temperature: Serve warm, ideally with a scoop of vanilla ice cream or whipped cream.
Conclusion
Making a delicious apple crisp recipe at home brings warmth and comfort to any kitchen. Choose firm apples and bake a golden oat topping for balanced texture and flavor.
Let the dessert rest after baking. This step thickens the fruit juices into a rich sauce that coats every slice. Serve it with a scoop of vanilla ice cream or a dollop of whipped cream.
This top apple crisp with oats recipe is one you need to try this fall. Swap ingredients to match your dietary needs or pantry staples. Your journey toward a delicious apple crisp recipe starts with basic techniques and patience.
Enjoy baking this classic dish during your next relaxed weekend. Sharing a warm, homemade dessert creates lasting memories around your table. Grab your favorite baking dish and start your oven for the season’s best flavors.