
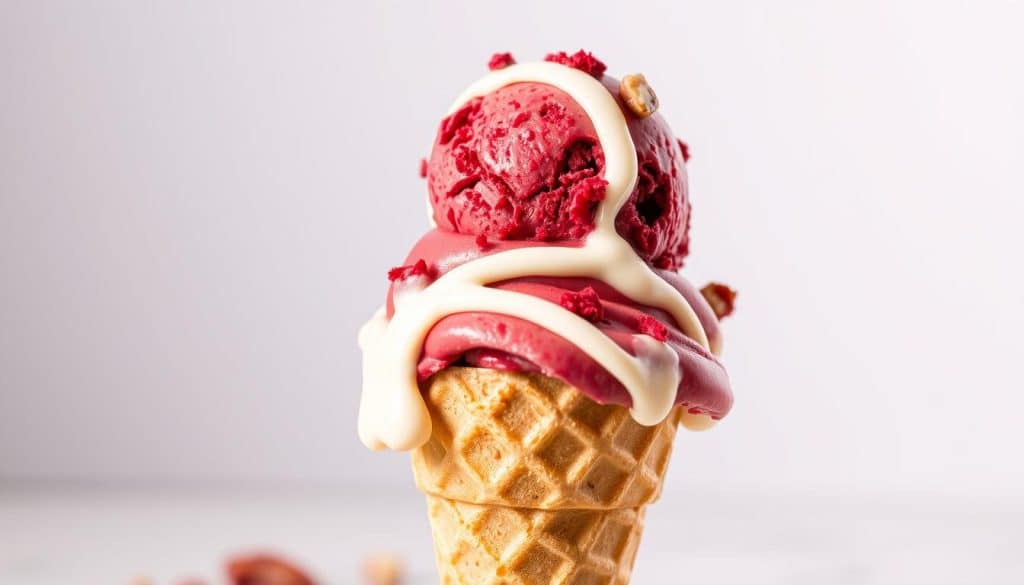
Red Velvet Cake Ice Cream
A dreamy fusion of velvety cake and creamy delight! This Red Velvet Cake Ice Cream is rich, indulgent, and perfect for any sweet craving
Ingredients:
-
2 cups heavy whipping cream
-
1 cup whole milk
-
¾ cup granulated sugar
-
1 tsp vanilla extract
-
½ cup sweetened condensed milk
-
3 tbsp unsweetened cocoa powder
-
1 tbsp red food coloring
-
1 cup crumbled red velvet cake (store-bought or homemade)
-
Pinch of salt
Instructions:
-
In a large mixing bowl, whisk together heavy cream, whole milk, granulated sugar, and vanilla extract until the sugar dissolves completely. ( 5 minutes)
-
Add cocoa powder and red food coloring. Stir until well blended and the mixture has a uniform, deep red color. ( 3 minutes)
-
Fold in the sweetened condensed milk and a pinch of salt for extra creaminess. ( 2 minutes)
-
Pour the mixture into an ice cream maker and churn according to the manufacturer’s instructions, usually about 20–25 minutes. ( 25 minutes)
-
Once churned and thick, gently fold in the crumbled red velvet cake, making sure it’s evenly distributed. ( 3 minutes)
-
Transfer the ice cream to a freezer-safe container, cover, and freeze for at least 4 hours or overnight until firm. ( 4+ hours)
-
Scoop, serve, and enjoy this luscious red velvet dream!
Prep Time: 10 minutes | Churn Time: 25 minutes | Freeze Time: 4 hours | Total Time: 4 hours 35 minutes
Kcal: 320 kcal per serving | Servings: 8 servings.
5 Easy Tips for Making Perfect Red Velvet Ice Cream at Home
Imagine enjoying a decadent dessert that’s both creamy and kind to animals. Making vegan red velvet cake ice cream at home is simpler than you might think. We’re here to show you how.
With just a few easy tips, you can whip up a delicious dairy-free ice cream. It’s perfect for hot summer days or whenever you crave something sweet. Our guide will help you make homemade ice cream that’s both yummy and fits your dietary needs.
Key Takeaways
- Learn how to make vegan red velvet cake ice cream at home
- Discover simple tips for creating dairy-free ice cream
- Find out how to achieve the perfect creamy texture
- Get tips on customizing your homemade ice cream recipe
- Understand the benefits of making ice cream at home
The Rich History of Red Velvet Cake and Its Evolution into Ice Cream
Red velvet cake has a long and interesting history. It has changed a lot over the years. This change is due to new tastes and cooking ideas.
Origins of Red Velvet Cake
The story of red velvet cake starts in the early 1900s in the United States. Its red color comes from cocoa powder and buttermilk. The unique flavor and color made it a favorite in Southern America.
The Transition from Cake to Frozen Dessert
As cooking got more creative, red velvet cake’s taste was used in ice cream. Making the cake into ice cream was a big change. Vegan dessert ideas came along, using plant-based ingredients to make it. This created a tasty and new dessert that still feels like the original cake.
Turning red velvet cake into ice cream shows how versatile it is. Now, we can enjoy it in fresh and exciting ways.
What Is Red Velvet Ice Cream Really Made Of?
Red velvet ice cream is a mix of special ingredients. It combines the taste of red velvet cake with ice cream’s creaminess.
Traditional Ingredients vs. Vegan Alternatives
Traditionally, red velvet ice cream uses cream, sugar, and cocoa powder. Food coloring gives it its red color. But, vegan options have come up. Dairy-free red velvet cake recipes use plant-based milks and vegan cream cheese. This lets everyone enjoy it.
The Truth About Red Velvet Flavor (More Than Just Chocolate)
Red velvet flavor is more than chocolate. It has hints of vanilla and a tangy taste from cream cheese icing for red velvet cake. This mix makes red velvet ice cream unique.
Why Cream Cheese Is Essential to the Red Velvet Experience
Cream cheese adds a tangy touch to red velvet. In vegan versions, vegan ice cream flavors use cashew-based cream cheese or tofu. This gives a similar tanginess.
Knowing the ingredients helps us appreciate the effort in making red velvet ice cream. This is true for both traditional and vegan versions.
Vegan Red Velvet Cake Ice Cream – Dairy-Free and Delicious
Vegan red velvet ice cream is a creamy treat for those who follow a plant-based diet. It’s not only tasty but also meets different dietary needs and preferences.
Plant-Based Milk and Cream Alternatives
The base of vegan red velvet ice cream is plant-based milk and cream. Almond milk, coconut milk, and cashew cream make it creamy without dairy.
- Almond milk adds a subtle nutty flavor
- Coconut milk contributes to a rich and creamy texture
- Cashew cream offers a smooth and velvety consistency
Vegan Cream Cheese Options
Vegan cream cheese is key for the red velvet taste. Brands like Tofutti and Kite Hill make great dairy-free options for ice cream.
Key characteristics of vegan cream cheese:
- High fat content for creaminess
- Tangy flavor profile
- Easy to mix with other ingredients
Natural Red Coloring Alternatives
Getting the red color of red velvet cake ice cream without artificial dyes is easy. Beetroot juice and pomegranate juice are great for a vibrant red.

Health Benefits of Dairy-Free Red Velvet Ice Cream
Dairy-free red velvet ice cream has health perks. It’s often lower in saturated fats and calories than regular ice cream, making it a guilt-free treat.
The benefits include:
- Lower risk of dairy intolerance symptoms
- Potential reduction in calorie intake
- Alignment with a more sustainable and cruelty-free lifestyle
Tip #1: Creating the Perfect Vegan Cream Cheese Icing Swirl
Make your vegan red velvet ice cream even better with a creamy icing swirl. It’s easy to make and boosts the flavor. Plus, it looks great in your homemade ice cream recipe.
Essential Ingredients for Dairy-Free Cream Cheese Icing
To make a tasty cream cheese icing for red velvet cake, you need a few key items. Use a vegan cream cheese alternative, like cashew or soy. Mix it with powdered sugar, a bit of salt, and vanilla extract. For a tangy twist, add some fresh lemon juice.
Achieving the Right Consistency for Freezing
The icing’s consistency is important for freezing. It should be firm enough to hold its shape but still soft for smooth swirling. Chill it in the fridge for 30 minutes before adding it to your vegan dessert ideas.
Swirling Techniques for Visual Appeal
When your icing is chilled, it’s time to swirl it into your ice cream. Use a piping bag or a ziplock bag with a corner cut off. Swirl the icing in a figure-eight motion to spread it evenly. This makes your ice cream look good and ensures every bite is creamy and tangy.
Tip #2: Balancing Cocoa and Vanilla for Authentic Red Velvet Flavor
To get the real taste of red velvet in ice cream, you need to mix cocoa and vanilla just right. The classic red velvet cake has a soft cocoa taste with a hint of vanilla. This mix is key for vegan red velvet ice cream.
The Perfect Cocoa-to-Vanilla Ratio
The traditional red velvet cake recipe has a special mix of cocoa and vanilla. For vegan ice cream, start with 2 parts cocoa to 1 part vanilla. You can tweak this to taste, but it’s a good starting point. High-quality cocoa powder is important for a deep flavor.
Enhancing Flavor with Natural Extracts
Adding natural extracts can make your red velvet ice cream even better. A little almond extract can add depth, and coconut extract can make it creamier. But don’t add too much, as it can mess up the balance.
Common Flavor Mistakes to Avoid
One big mistake is using too much cocoa, making it taste like chocolate. Another is using bad vanilla extract, which can make it taste bland. Make sure both cocoa and vanilla are top-notch and used just right.
By mixing cocoa and vanilla well and adding natural extracts, you can make vegan red velvet ice cream that tastes just like the real thing. Try different mixes and extracts to find your favorite.
Tip #3: Achieving the Perfect Red Color Without Artificial Dyes
Making vegan red velvet ice cream that looks as good as it tastes is key. The red color of red velvet desserts is famous. Getting this color without artificial dyes is doable and better for those who want natural products.
Natural Plant-Based Coloring Options
Several natural ingredients can give your ice cream a beautiful red color. Beetroot powder is a top pick, made from beets for a deep red. You can also use red cabbage extract and pomegranate juice for a vibrant red. Start with a little and add more as needed, as the color can change.
How to Maintain Vibrant Color During Freezing
To keep the red color bright while freezing, follow these tips:
- Use a stabilizer like arrowroot powder or cornstarch to keep the color and texture right.
- Store the ice cream in a tight container to avoid light.
- Keep the freezer at a steady temperature to stop color fading.
Color Troubleshooting Guide
If your ice cream isn’t the right color, check these things:
- Did you use enough natural coloring?
- Was the mix exposed to light or had uneven freezer temps?
- Are there ingredients that might affect the color?
Fixing these issues can help you get a bright, natural red color in your vegan red velvet ice cream.
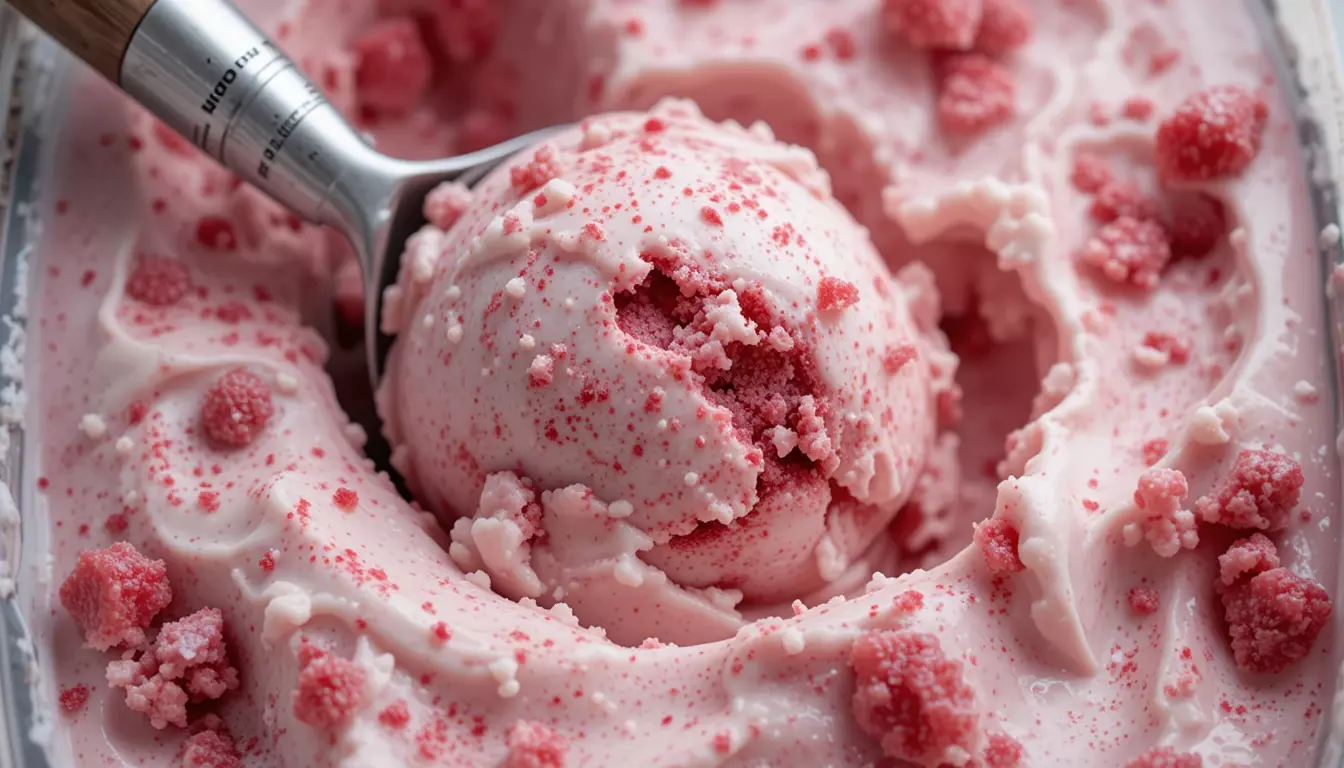
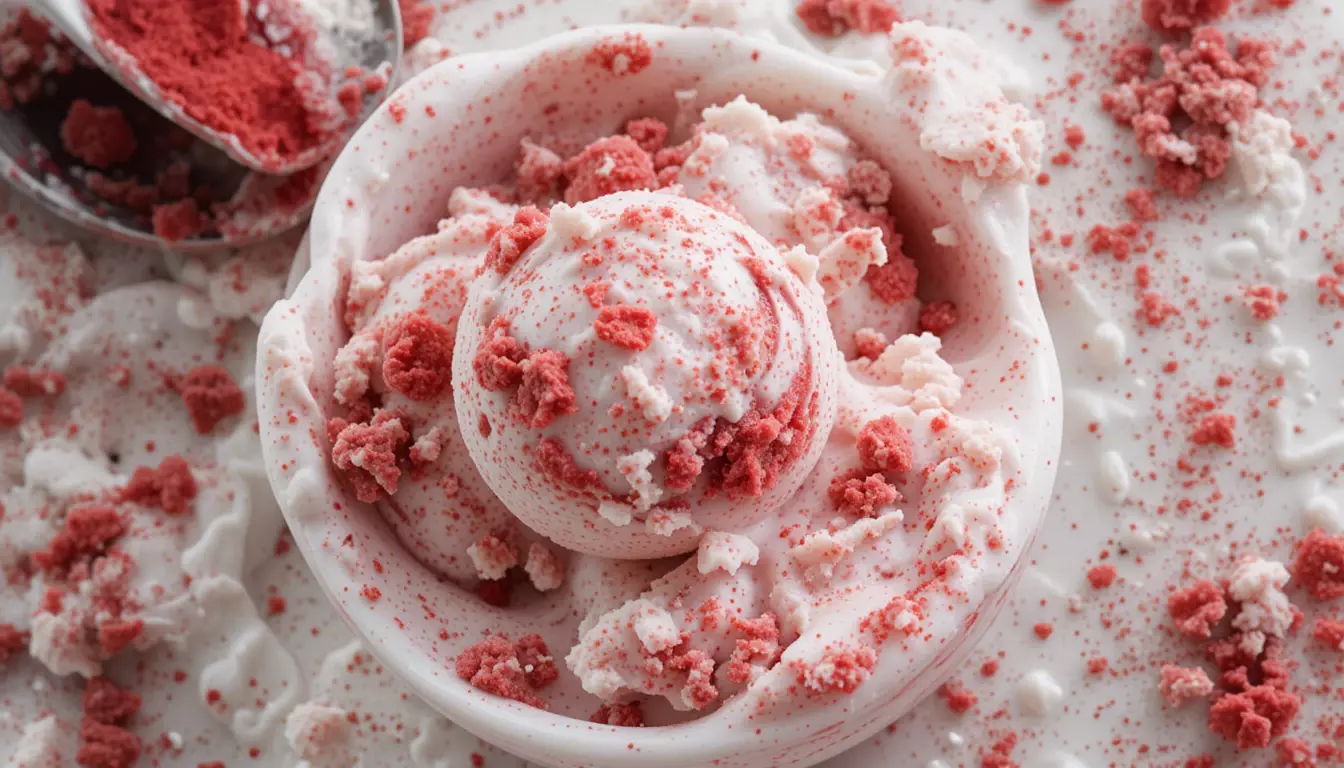
Tip #4: Incorporating Red Velvet Cake Pieces for Texture
To make your vegan red velvet ice cream even better, add chunks of red velvet cake. This not only adds texture but also boosts the red velvet flavor.
Quick Vegan Red Velvet Cake Recipe for Mix-ins
To make vegan red velvet cake pieces, you’ll need almond milk, canola oil, apple cider vinegar, and natural red food coloring. Here’s a simple recipe:
- 1 1/2 cups all-purpose flour
- 1 cup granulated sugar
- 1/2 cup unsweetened cocoa powder
- 1 teaspoon baking powder
- 1 teaspoon salt
- 1 cup almond milk
- 1/2 cup canola oil
- 2 teaspoons apple cider vinegar
- 1 teaspoon vanilla extract
- Natural red food coloring
Mix the dry ingredients in one bowl and the wet ingredients in another. Then, combine them and pour into a greased cake pan. Bake at 350°F for about 30 minutes or until a toothpick comes out clean. Let it cool, then crumble it into pieces.
When to Add Cake Pieces During the Churning Process
Add cake pieces during the last 2 minutes of churning. This way, they’re evenly spread without getting too crushed.
Preventing Sogginess in Cake Inclusions
To keep cake pieces from getting soggy, pre-freeze them. Here’s a table summarizing the steps:
| Method | Description | Benefit |
|---|---|---|
| Pre-freezing | Freeze cake pieces before adding to ice cream | Maintains texture |
| Size Control | Cut cake into small, uniform pieces | Even distribution |
| Dry Ingredients | Use minimal wet ingredients in cake recipe | Reduces sogginess |
Size and Preparation Techniques
Cut the cake into small, uniform pieces for even distribution. Use a cookie scoop or knife for the right size.
Pre-freezing Methods
Spread the cake pieces on a baking sheet and freeze for at least 30 minutes before adding to your ice cream. This keeps their texture.
Adding red velvet cake pieces to your vegan ice cream makes it special. It adds a delightful contrast in texture and flavor.
Tip #5: Mastering the Churning Process for Creamy Dairy-Free Results
Making homemade ice cream is more than just a recipe. It’s about mastering the churning process. This process adds air, making the ice cream smooth and creamy.
Equipment Options for Home Ice Cream Making
There are many ways to churn ice cream at home. The most common is an ice cream maker, which can be electric or manual. Electric makers are easier to use and give consistent results.
If you don’t have an ice cream maker, don’t worry. You can use the blender method or whipped coconut cream method. Both are great no-churn options.
Timing and Temperature Considerations
Timing and temperature are key in churning ice cream. Most makers have guidelines for the best temperature and time. Aim for a temperature of -18°C (0°F) for the best results.
No-Churn Alternatives for Those Without Ice Cream Makers
Even without an ice cream maker, you can still make creamy dairy-free ice cream.
Blender Method
The blender method blends the mixture until it’s smooth. Then, freeze it and blend again until it’s creamy. This method needs blending a few times to get the right texture.
Whipped Coconut Cream Method
The whipped coconut cream method uses coconut cream’s fat to make it creamy. Whip it with sweetener and flavorings to make delicious dairy-free ice cream.
| Method | Equipment Needed | Time Required |
|---|---|---|
| Ice Cream Maker | Electric or Manual Ice Cream Maker | 20-30 minutes |
| Blender Method | Blender, Freezer-Safe Container | 2-3 hours |
| Whipped Coconut Cream | Mixer or Blender, Refrigerator | 1-2 hours |
Mastering the churning process, with or without an ice cream maker, lets you make delicious dairy-free ice cream. It’s perfect for any time.
Creating a Showstopping Red Velvet Ice Cream Cake
Imagine slicing into a majestic red velvet ice cream cake. Its vibrant color and creamy texture will dazzle your guests. It’s perfect for special occasions like birthdays and anniversaries.
Step-by-Step Assembly Guide
To start, prepare your vegan ice cream as the recipe says. Once it’s frozen, scoop it into balls. Freeze each layer for at least 30 minutes to keep it stable.
Layering Techniques for Perfect Structure
For a sturdy cake, layer ice cream with crushed vegan red velvet cake or cookies. This adds texture and keeps the cake stable. Be gentle when layering to avoid mixing the components.
| Layer | Component | Freezing Time |
|---|---|---|
| 1 | Ice Cream | 30 minutes |
| 2 | Crushed Cake | 15 minutes |
| 3 | Ice Cream | 30 minutes |
Freezing Times and Temperature Management
Keep your freezer at 0°F (-18°C) or below. The whole cake needs to freeze for at least 2 hours before serving.
Decoration Ideas for Special Occasions
For a stunning finish, top your cake with vegan whipped cream. Decorate with red velvet cake crumbs or fresh berries.
“The art of dessert decoration lies in the details.” – Pastry Chef
Consider using edible flowers or chocolate shavings for extra elegance.
Storage and Make-Ahead Tips for Homemade Vegan Ice Cream
To enjoy your homemade vegan ice cream at its best, follow these storage and make-ahead tips. Proper storage ensures that your dairy-free ice cream remains fresh and delicious for as long as possible.
Best Containers for Preventing Freezer Burn
Choosing the right containers is key to preventing freezer burn. Look for airtight containers made from stainless steel or BPA-free plastic. These containers keep cold air out, preventing ice crystals from forming.
Optimal Freezing Temperatures
The ideal freezer temperature for storing ice cream is between 0°F and -10°F (-18°C to -23°C). Keeping your freezer at this range helps keep your vegan ice cream flavors fresh and creamy. Make sure your freezer is set correctly for the best results.
How to Properly Thaw for Serving
When you’re ready to serve your dairy-free ice cream, take it out of the freezer. Let it sit at room temperature for 5-10 minutes. This makes it easier to scoop. Avoid microwaving, as it can cause uneven thawing.
Shelf Life and Freshness Indicators
Homemade vegan ice cream typically lasts 2-3 months in the freezer. Look for signs of freezer burn, like ice crystals or an off-flavor. If the ice cream smells or looks unusual, it’s time to throw it away.
Troubleshooting Common Issues with Vegan Red Velvet Ice Cream
Making the perfect vegan red velvet ice cream needs a good recipe and knowing how to fix common problems. Issues like ice crystallization, texture problems, and imbalances in sweetness and flavor can happen even with careful preparation.
Preventing Ice Crystallization
Ice crystallization can make your ice cream taste icy instead of smooth. To avoid this, make sure your mixture is cold before churning. Also, don’t add warm ingredients during the process. “A cold mixture is key to a smooth texture,” experts say.
Fixing Texture Problems
If your ice cream is too hard or too soft, it might be because of wrong churning times or temperatures. Changing your churning method can help get the right consistency.
Adjusting Sweetness and Flavor Balance
Check the taste of your mixture before freezing and adjust sweetness and flavor as needed. Freezing can dull flavors, so a bit stronger flavor is better.
Rescuing Separated or Curdled Mixtures
If your mixture separates or curdles, don’t worry. Just re-blend it until it’s smooth and go on with your recipe. “A quick re-blend can often rescue a separated mixture,” an expert advises.
By tackling these common issues, you can make sure your vegan red velvet cake ice cream is delicious and creamy every time. With these tips, you’ll be on your way to making the best vegan ice cream possible.
Conclusion: Enjoying Your Homemade Vegan Red Velvet Ice Cream Creation
Now that you’ve learned how to make vegan red velvet cake ice cream, it’s time to enjoy it. You’ve got all the tips and techniques to make a unique plant-based dessert. It’s perfect for any special occasion.
By using natural coloring and balancing cocoa and vanilla, you’ll get a real vegan red velvet taste. Adding vegan cream cheese icing swirls makes it even more authentic. Your homemade ice cream will impress anyone, whether it’s at a party or just for you.
The best part of homemade ice cream is the taste and the fun of making it. So, try different mix-ins and flavors to make your ice cream special. Enjoy every bite of your homemade vegan red velvet cake ice cream. You’ll feel proud of creating a delicious plant-based dessert.
FAQ
What is vegan red velvet cake ice cream?
Vegan red velvet cake ice cream is a tasty treat. It’s made with plant-based milk and vegan cream cheese. It also uses natural red coloring alternatives. This dessert captures the taste of traditional red velvet cake in ice cream form.
Can I make red velvet ice cream without an ice cream maker?
Yes, you can make red velvet ice cream without an ice cream maker. You can use no-churn methods like the blender method or whipped coconut cream method.
How do I achieve the perfect red color in my vegan red velvet ice cream?
To get the perfect red color, use natural coloring like beetroot or annatto. Keep the color vibrant by adjusting the mixture’s pH level or using a stabilizer.
What are some common issues with vegan red velvet ice cream and how can I troubleshoot them?
Issues include ice crystallization, texture problems, and imbalances in sweetness and flavor. Fix these by adjusting the mixture’s consistency, using stabilizers, or tweaking the flavor balance.
How do I store homemade vegan ice cream to maintain its quality?
Store homemade vegan ice cream in airtight containers at the right freezing temperatures. Thaw it properly before serving to keep its creamy texture and flavor.
Can I incorporate red velvet cake pieces into my ice cream for added texture?
Yes, you can add red velvet cake pieces to your ice cream. Bake a quick vegan red velvet cake, crumble it, and add it during churning.
What are some tips for creating a show-stopping red velvet ice cream cake?
To make a stunning red velvet ice cream cake, follow a step-by-step guide. Use layering techniques for a perfect structure. Manage freezing times and temperatures. Decorate with creative ideas for special occasions.
Is vegan red velvet ice cream a healthier alternative to traditional ice cream?
Yes, vegan red velvet ice cream is a healthier option. It’s dairy-free, has less saturated fat, and can use natural sweeteners and coloring options.
Link source:
-
History of Red Velvet Cake
➤ Anchor Text: Learn the history of Red Velvet Cake -
Tips for Using an Ice Cream Maker
➤ Anchor Text: Tips on using an ice cream maker at home -
Understanding Food Coloring
➤ Anchor Text: What you should know about food coloring