

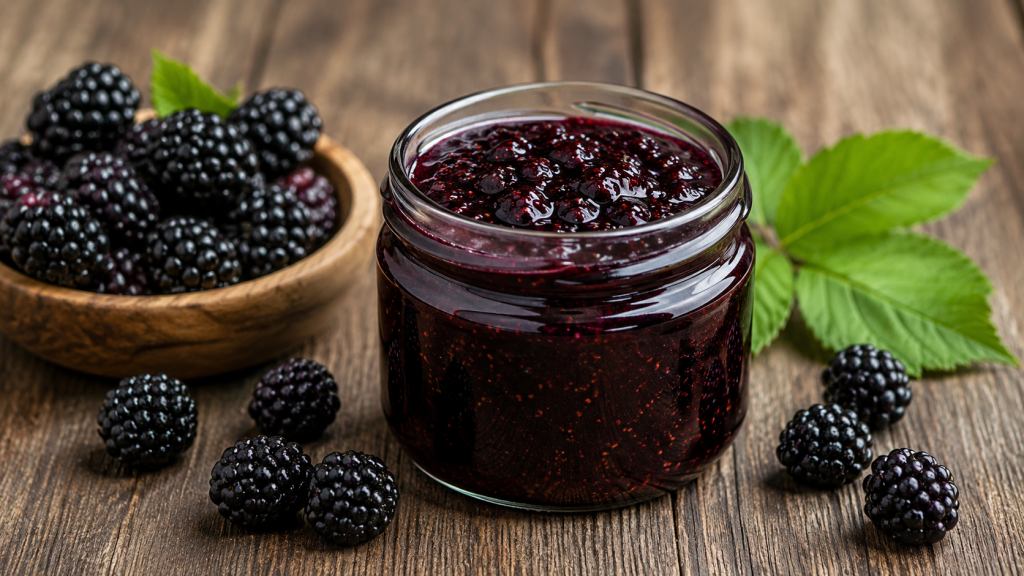
Blackberry Jam Delight
Sweet, fruity, and bursting with fresh blackberry flavor! This homemade blackberry jam is easy to make, naturally delicious, and perfect for spreading on toast, biscuits, pancakes, or adding to your favorite desserts.
Ingredients:
- 4 cups fresh blackberries
- 3 cups granulated sugar
- 2 tbsp fresh lemon juice
- 1 tsp lemon zest (optional)
- 2 tbsp water
Instructions:
- Wash the blackberries thoroughly and remove any stems or damaged berries.
Duration: 5 minutes - Place the blackberries and water into a large saucepan. Cook over medium heat, stirring occasionally until the berries soften and release their juices.
Duration: 10 minutes - Mash the berries with a potato masher or spoon until you reach your desired consistency.
Duration: 3 minutes - Add the sugar, lemon juice, and lemon zest. Stir continuously until the sugar is completely dissolved.
Duration: 5 minutes - Increase the heat and bring the mixture to a rolling boil. Continue boiling while stirring frequently until the jam thickens.
Duration: 20-25 minutes - Test the jam by placing a small spoonful on a chilled plate. If it wrinkles when pushed with your finger, it’s ready.
Duration: 2 minutes - Carefully pour the hot jam into sterilized jars, leaving a little space at the top. Seal tightly with lids.
Duration: 5 minutes - Allow the jars to cool completely before storing in the refrigerator or pantry.
Duration: 30 minutes
Prep Time: 10 minutes | Cooking Time: 40 minutes | Total Time: 50 minutes
Kcal: 65 kcal per tablespoon | Servings: 32 tablespoons.
How to Make Blackberry Jam Like a Pro at Home
Ever wondered why store-bought jam doesn’t taste as fresh as you’d like? Making your own jam at home is a rewarding culinary skill. It turns simple fruit into a gourmet treat.


Learning to make the perfect blackberry jam recipe is simpler than you think. By choosing the right ingredients and heating them just right, you get a jam that tastes like a pro made it.
When you learn how to make blackberry jam, you can adjust the sweetness and texture to your liking. Just follow these easy steps to make a homemade jam that will impress everyone at your breakfast table.
Key Takeaways
- Select ripe, firm fruit for the best natural pectin levels.
- Use a heavy-bottomed pot to prevent scorching during the boiling process.
- Test for the perfect set using the chilled plate method.
- Sterilize your jars thoroughly to ensure long-lasting freshness.
- Experiment with citrus zest or spices to create unique flavor profiles.
Understanding the Basics of Blackberry Jam
Making homemade blackberry jam is a fun and rewarding process. It turns simple fruit into a delicious treat. You get to control every ingredient, making sure each bite is full of flavor.
This isn’t just about boiling fruit. It’s an art that connects you to the seasons.

Why Homemade Jam Beats Store-Bought
Store-bought jams often have corn syrup, artificial colors, and preservatives. But homemade blackberry jam is different. It uses the natural sweetness and tartness of the berries.
You can taste the real difference. The fruit is the main attraction, not hidden by additives.
“Cooking is at once child’s play and adult joy. And cooking done with care is an act of love.”
When you make your own jam, you can adjust the sugar to your liking. This makes your jam the best blackberry jam recipe for you. It’s not just a spread; it’s a healthier, tastier choice for your family.
| Feature | Store-Bought Jam | Homemade Jam |
|---|---|---|
| Fruit Content | Low (often includes fillers) | High (pure fruit focus) |
| Sweeteners | Corn syrup or glucose | Natural cane sugar |
| Preservatives | Artificial additives | Natural fruit acids |
| Flavor Profile | Uniform and generic | Complex and fresh |
The Science of Setting: Do Blackberries Need Pectin?
Many people wonder if blackberries need pectin for jam. Blackberries have little pectin, which is key for jam’s gel-like texture. Adding pectin helps ensure a consistent texture every time.
To make the best blackberry jam, balance sugar, acid, and pectin. Sugar and pectin create a strong network, while acid helps extract fruit pectin. Getting this balance right is crucial for a perfect jam.
Essential Equipment for Your Jam-Making Journey
Every great batch of fruit preserves starts with a well-organized kitchen and the right tools. Getting your workspace ready is key to mastering a top-rated blackberry jam recipe for beginners. The right gear makes the whole process smoother and more fun.
Must-Have Kitchen Tools
Quality equipment is crucial for the best results. A heavy-bottomed pot is vital to prevent scorching. You’ll also need reliable canning jars and fresh lids to keep your homemade blackberry jam fresh for months.
Here are the core items you should keep on your counter:
- Heavy-bottomed stainless steel pot: Distributes heat evenly to prevent burning.
- Canning jars with new lids: Essential for creating a proper vacuum seal.
- Jar lifter: A specialized tong that keeps your hands safe from boiling water.
- Wide-mouth funnel: Helps you fill jars cleanly without making a mess.

Sterilizing Jars for Long-Term Storage
Safety is key when preserving food at home. Sterilizing your jars keeps your homemade blackberry jam safe and free from bacteria. Always use clean, heat-tempered glass jars without chips or cracks.
To sterilize, submerge your clean jars in boiling water for at least ten minutes. Keep them in the hot water until you’re ready to fill them. This simple step ensures your hard work results in a safe, delicious product all year long.
Sourcing and Preparing Your Fresh Blackberries
Your journey to making the perfect jam starts with the quality of your fruit. It’s key to use the best fruit for delicious blackberry preserves. Ripe, flavorful berries make your jam vibrant and full of taste.

How Many Cups of Blackberries Do You Need for Jam?
For a top-notch jam, consistency is crucial. Aim for 6 to 8 cups of crushed berries for a standard batch. This amount makes enough fresh blackberry jam for four to five half-pint jars.
“The secret to a great preserve is not just the recipe, but the integrity of the fruit you choose to put in the pot.”
Measuring crushed berries is more accurate than whole ones. This step helps avoid a runny or too thick jam. Always have a measuring cup ready for the perfect balance of fruit and sugar.
Cleaning and Sorting Your Berries
Starting with clean ingredients is key to canning success. First, rinse your berries gently in a colander under cool water. This removes dust and field debris. Be gentle, as blackberries bruise easily.
After rinsing, lay the berries on a clean towel to check them. Remove any stems, leaves, or unripe fruit. This step ensures only the best berries go into your fresh blackberry jam. It makes your blackberry preserves even better.
The Secret to Perfect Blackberry Jam Every Time
Getting your fruit preserves just right is all about knowing how they thicken. A truly professional homemade preserve has the perfect set. By paying attention to a few key signs, you can make the best blackberry jam recipe in your kitchen.
Achieving the Ideal Consistency
Getting the right consistency is about finding the right mix of fruit, sugar, and pectin. As you cook the berries, the water evaporates, making the mix spreadable. For an easy blackberry jam, watch the heat closely to avoid burning the fruit.
A good jam should hold its shape on a spoon but still spread easily. If it’s too runny, the fruit might not have reached the right temperature. Patience is your best friend during this part.
Testing for the Gel Point Without a Thermometer
You don’t need fancy tools to know when your jam is done. The freezer plate test is the most reliable method. Before cooking, chill a small ceramic plate in your freezer.
When you think the jam is ready, take it off the heat and put a small spoonful on the cold plate. Let it sit for a minute, then press the edge with your finger. If the surface wrinkles and stays in place, it’s ready.
If it’s still runny, cook it a bit longer and test again. This method is a great way to make sure your best blackberry jam recipe is perfect every time. It’s a simple, easy blackberry jam trick that boosts your confidence in the kitchen.
How to Make Blackberry Jam Recipe: A Step-by-Step Guide
Capture the essence of summer by making your own fruit preserve. A reliable blackberry jam recipe lets you choose the ingredients. This guide is easy to follow, perfect for cooks of all levels.
Preparing the Fruit Base
The key to great blackberry jam is the fruit quality. Start by rinsing the berries in cool water to remove debris. Pick out any stems or overripe berries to keep the jam’s texture right.
After cleaning, put the berries in a big pot. Use a potato masher to crush them to your liking. You can have a chunky or smooth jam.
Cooking the Jam to Perfection
Now, it’s time to heat the fruit. Add sugar and lemon juice to the pot. Stir until the sugar dissolves.
Heat it up to a rolling boil that you can’t stir down. Watch it closely to avoid burning. Keep boiling until it thickens and reaches the right gel point.
Filling and Sealing Your Jars
Storing your blackberry jam right is key to keeping it fresh. Ladle the hot jam into clean, sterilized jars, leaving a bit of space at the top. Wipe the rims with a damp cloth for a clean seal.
Put the lids on tight and boil the jars in water to seal them properly. Here are some quick tips:
- Use fresh, firm berries for the best taste.
- Keep your workspace clean to avoid contamination.
- Let the jars cool for 24 hours before checking the seals.
By following this blackberry jam recipe, you’ll make a delicious treat. It’s perfect for toast, yogurt, or baking. You’ll love knowing what’s in your homemade jam.
Mastering the Seedless Blackberry Jam Technique
Making silky, seedless jam is key for top-notch fruit preserves. Some like the texture of whole berries, while others prefer smooth jam. This skill lets you make blackberry preserves just how you like them.
How Do You Remove Seeds from Blackberries Effectively?
To get rid of seeds, first soften the berries. Simmer them with a bit of water or lemon juice until they’re mushy. This essential step helps the pulp separate from the seeds.
After the berries are soft, start pressing them through a tool. Use a heavy spoon or a silicone spatula. Consistency is key, so take your time to get as much pulp as you can without the seeds.
Using a Food Mill vs. Fine Mesh Strainer
The right tool depends on how much fruit you’re working with. A food mill is great for big batches. It has a rotating blade that pushes fruit through a plate, saving time.
For smaller amounts, a fine mesh strainer is a fantastic, budget-friendly option. It takes more effort but lets you control the jam’s texture. Just press the fruit through the mesh until only seeds are left.
The Best Blackberry Jam Recipe Without Pectin
Want to capture summer’s essence? Try making blackberry jam without pectin. This method uses the fruit’s natural properties for a thick, luscious spread. It lets the berries’ vibrant flavors shine in every jar.
Why Choose a No-Pectin Approach?
Many prefer this method for its clean, intense fruit taste. Skipping added pectin lets the berries’ natural tartness shine. It’s ideal for those who love simplicity and quality ingredients.
Making your own blackberry jam without pectin lets you control the texture. You can choose how chunky or smooth you want it. It’s a rewarding process that connects you to traditional food preservation.
Balancing Sugar and Natural Fruit Acids
To get a good set, you need to balance sugar, heat, and fruit acids. Sugar preserves the fruit and helps release juices. The acidity helps the fruit’s pectin bond, creating the best blackberry jam recipe.
If your berries are sweet, add a bit of fresh lemon juice. This keeps the blackberry jam recipe balanced. With patience and attention, you can make the best blackberry jam recipe for your family to enjoy all year.
Healthy Variations and Dietary Adjustments
Adapting traditional recipes lets you make a tasty, low sugar blackberry jam for a balanced diet. Everyone can enjoy the sweet flavors of fresh fruit preserves, no matter their health needs. A few smart changes keep your favorite spread nutritious and delicious.
How to Make Jam for Diabetics
Managing blood sugar doesn’t mean skipping your morning toast toppings. For a diabetic-friendly jam, use sugar alcohols like erythritol or natural sweeteners like stevia. These sweeteners add sweetness without the blood sugar spikes of white sugar.
When making a low sugar blackberry jam, note that these sweeteners affect pectin differently. You might need special pectin for low-sugar recipes. This change keeps your homemade treat safe and tasty.
Creating Healthy Blackberry Jam Without Artificial Preservatives
Many store-bought jams have additives and chemical preservatives. You can avoid these by using fresh lemon juice as a natural preservative. Choose high-quality, ripe blackberries for a jam with a rich, natural flavor.
Proper canning techniques are key to keeping your jam fresh without artificial ingredients. Sterilize and seal your jars correctly to make a shelf-stable low sugar blackberry jam that lasts months. Taking control of your ingredients ensures your family eats only the healthiest food.
Easy and Delicious Blackberry Jam Recipe for Busy Families
You don’t need all afternoon to make fresh blackberry jam. Many think preserving fruit takes hours, but new methods make it quicker. Making small batches means you can enjoy a tasty treat even when your schedule is tight.
Streamlining the Process for Quick Results
The secret to an easy blackberry jam is a simple ingredient list. Just use fresh berries, sugar, and a bit of lemon juice. This blackberry jam recipe lets the fruit’s natural flavor stand out, without extra additives.
Small batches cook faster. This means your jam sets quicker, perfect for families who want homemade jam without the big cleanup.
| Batch Size | Prep Time | Cook Time | Best For |
|---|---|---|---|
| Small (2 Jars) | 10 Minutes | 15 Minutes | Quick Breakfasts |
| Medium (4 Jars) | 15 Minutes | 25 Minutes | Weekend Brunch |
| Large (8+ Jars) | 30 Minutes | 45 Minutes | Holiday Gifting |
Storage Tips for Freshness
After making your easy blackberry jam, store it right to keep it fresh. Keep jars in the fridge if you’ll use them in a few weeks. This fresh blackberry jam stays vibrant and tasty for up to a month in the fridge.
If you prefer pantry storage, use sterilized jars with tight lids. Always label jars with the date made. This simple blackberry jam recipe means you always have a sweet spread for your morning toast or yogurt.
Troubleshooting Common Jam-Making Issues
Even the most skilled home cooks sometimes face problems when making jam. Whether you’re using a classic method or the latest blackberry jam recipe, small issues can pop up. Knowing how to spot and fix these problems can save your hard work.
What to Do If Your Jam Does Not Set
If your simple blackberry jam is still runny after cooling, don’t worry. This might happen if the fruit doesn’t have enough natural pectin or if it wasn’t cooked long enough. Try heating it up again with a bit of lemon juice to thicken it.
When making blackberry jam without pectin, the jam’s consistency depends on sugar and fruit acids. If it doesn’t set, you might need to add commercial pectin or cook it longer. Always test the jam’s consistency on a cold plate before sealing your jars.
Fixing Overcooked or Burnt Jam
Overcooking can make your jam rubbery or too dark. If you smell burnt, stop cooking and pour the jam into a clean container, leaving the burnt bits behind. You can’t fix a strong burnt taste, but adding water or lemon juice might help with minor overcooking.
When making blackberry jam without pectin for the first time, consistency issues are common. If the jam is too thick or sweet, reheat it with a bit of water to thin it out. Watch your pot closely during the last stages of cooking to avoid these problems.
| Issue | Primary Cause | Quick Fix |
|---|---|---|
| Runny Jam | Under-cooking | Re-boil with lemon |
| Burnt Flavor | High heat | Transfer to new pot |
| Too Thick | Over-cooking | Add water/reheat |
| Sugar Crystals | Improper dissolving | Stir while heating |
Conclusion
Learning to can turns your kitchen into a place of fresh flavors. You now know how to make the best homemade blackberry jam. This skill keeps your pantry full of tasty spreads all year.
Preserving lets you control every ingredient. You can make low sugar blackberry jam that’s sweet but healthier. It’s a better choice than store-bought jam.
Be proud of the jars you fill and seal. Sharing them with loved ones makes breakfast special. Start making more today and enjoy the joy of homemade preserves.
FAQ
How do you make blackberry jam from scratch at home?
Do blackberries need pectin for jam to set properly?
How many cups of blackberries do you need for jam?
How do you remove seeds from blackberries effectively?
What is the secret to perfect blackberry jam every time?
How to make jam for diabetics or those watching sugar intake?
Is there an easy blackberry jam recipe with just 3 ingredients?
What should I do if my jam does not set?
Link source:
- Anchor Text: Health Benefits of Blackberries
Link: https://en.wikipedia.org/wiki/Blackberry - Anchor Text: Safe Home Canning Guidelines
Link: https://en.wikipedia.org/wiki/Home_canning - Anchor Text: Understanding Fruit Pectin in Jam Making
Link: https://en.wikipedia.org/wiki/Pectin